一、服务端
version: "3"

services:
  v2ray:
    image: v2ray/official
    container_name: v2ray
    restart: always
    command: v2ray -config=/etc/v2ray/config.json
    ports:
      - "8888:80"
    volumes:
      - ./data:/etc/v2ray
      - ./v2ray.config.json:/etc/v2ray/config.json:ro
{
	"log": {
		"access": "/var/log/v2ray/access.log",
		"error": "/var/log/v2ray/error.log",
		"loglevel": "warning"
	},
	"inbound": {
		"port": 80,
		"protocol": "vmess",
		"settings": {
			"clients": [{
				"id": "01947a19-d50f-40ad-a3e0-7d25081f82a7",
				"level": 1,
				"alterId": 100
			}]
		},
		"streamSettings": {
			"network": "tcp",
			"tcpSettings": {
				"header": {
					"request": {
						"path": [
							"/"
						],
						"version": "1.1",
						"method": "GET",
						"headers": {
							"Host": "www.baidu.com",
							"Connection": [
								"keep-alive"
							],
							"Accept-Encoding": [
								"gzip, deflate"
							],
							"Pragma": "no-cache",
							"User-Agent": [
								"Mozilla/5.0 (Windows NT 10.0; WOW64) AppleWebKit/537.36 (KHTML, like Gecko) Chrome/55.0.2883.75 Safari/537.36",
								"Mozilla/5.0 (iPhone; CPU iPhone OS 10_0_2 like Mac OS X) AppleWebKit/601.1 (KHTML, like Gecko) CriOS/53.0.2785.109 Mobile/14A456 Safari/601.1.46"
							]
						}
					},
					"type": "http",
					"response": {
						"status": "200",
						"headers": {
							"Transfer-Encoding": [
								"chunked"
							],
							"Connection": [
								"keep-alive"
							],
							"Content-Type": [
								"application/octet-stream",
								"video/mpeg"
							],
							"Pragma": "no-cache"
						},
						"reason": "OK",
						"version": "1.1"
					}
				},
				"connectionReuse": true
			}
		}
	},
	"outbound": {
		"protocol": "freedom",
		"settings": {}
	},
	"outboundDetour": [{
		"protocol": "blackhole",
		"settings": {},
		"tag": "blocked"
	}],
	"routing": {
		"strategy": "rules",
		"settings": {
			"rules": [{
				"type": "field",
				"ip": [
					"0.0.0.0/8",
					"10.0.0.0/8",
					"100.64.0.0/10",
					"127.0.0.0/8",
					"169.254.0.0/16",
					"172.16.0.0/12",
					"192.0.0.0/24",
					"192.0.2.0/24",
					"192.168.0.0/16",
					"198.18.0.0/15",
					"198.51.100.0/24",
					"203.0.113.0/24",
					"::1/128",
					"fc00::/7",
					"fe80::/10"
				],
				"outboundTag": "blocked"
			}]
		}
	}
}
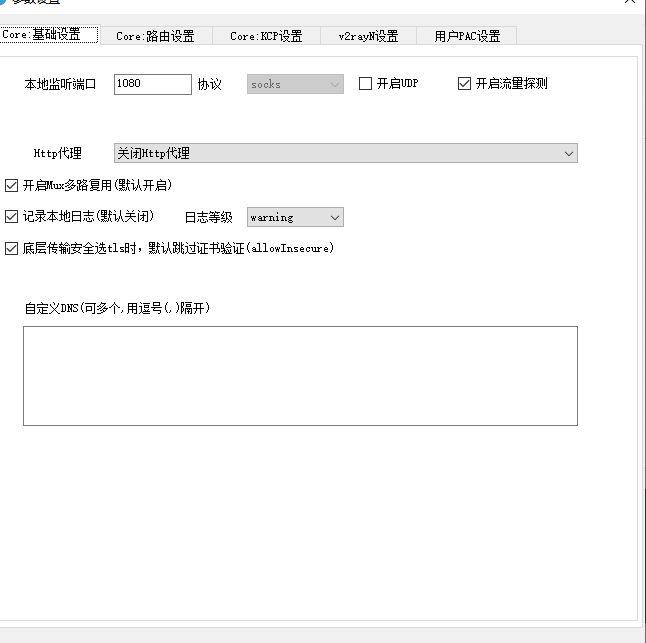
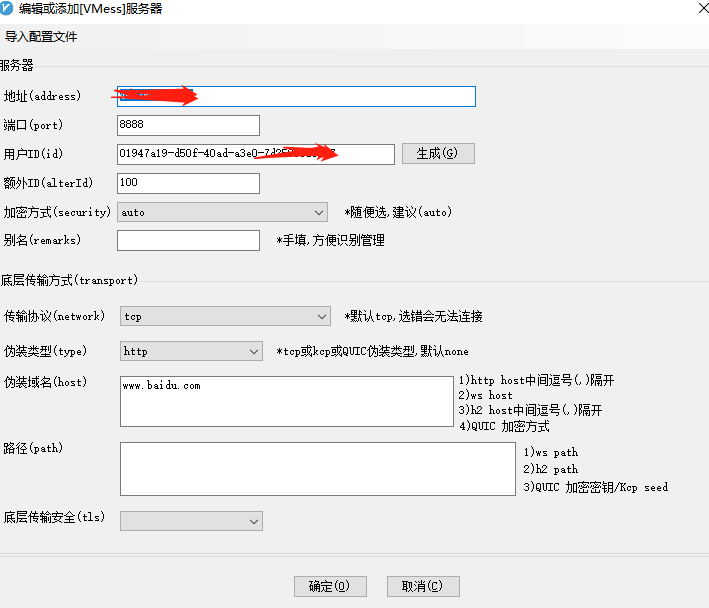
客户端