1.cd ~/code_bak
2.git clone --mirror https://github.com/coturn/coturn.git
3.git --git-dir=~/code_bak remote update,同步更新镜像
4.git push --mirror https://github.com/yyyy/xxxx.git
摘:CentOS7安装配置VSFTPD(虚拟用户方式)
一、安装
1. 查看是否安装vsftpd
rpm -qa | grep vsftpd
2. 安装
yum -y install vsftpd
3. 设置开机启用
ckconfig vsftpd on
二、配置vsftpd
打开vsftpd配置文件
# vi /etc/vsftpd/vftpd.conf
#设定不允许匿名访问
anonymous_enable=NO
#设定本地用户可以访问。注:如使用虚拟宿主用户,在该项目设定为NO的情况下所有虚拟用户将无法访问
local_enable=YES
write_enable=YES
local_umask=022
dirmessage_enable=YES
#记录上传下载文件的日志
xferlog_enable=YES
connect_from_port_20=YES
chown_uploads=YES
chown_username=ftp
#日志记录文件位置
xferlog_file=/var/log/vsftpd.log
#格式化日志
xferlog_std_format=YES
#设定支持ASCII模式的上传和下载功能
ascii_upload_enable=YES
ascii_download_enable=YES
//使用户不能离开主目录
chroot_list_enable=YES
#chroot_list_file=/etc/vsftpd/chroot_list
ls_recurse_enable=YES
#监听IPv4 sockets
listen=YES
#注释IPv6 sockets监听
#listen_ipv6=YES
#PAM认证文件名。PAM将根据/etc/pam.d/vsftpd进行认证 //已下三个请在配置文件中手动添加
pam_service_name=vsftpd
userlist_enable=YES
userlist_deny=YES
#/etc/vsftpd/user_list中的用户禁止登录ftp
#如果只配置userlist_enable=YES,有可能出现错误 “530 Permission denied”,因此加上如下配置
userlist_file=/etc/vsftpd/user_list
tcp_wrappers=YES
#设定启用虚拟用户功能
guest_enable=YES
//指定虚拟用户的宿主用户,CentOS中已经有内置的ftp用户了
guest_username=ftp
#设定虚拟用户个人vsftp的CentOS FTP服务文件存放路径。存放虚拟用户个性的CentOS FTP服务文件(配置文件名=虚拟用户名)
user_config_dir=/etc/vsftpd/vuser_conf
pasv_min_port=61001
pasv_max_port=62000
#文件上传下载权限设置
allow_writeable_chroot=YES
anon_umask=022
file_open_mode=777
#虚拟用户和本地用户有相同的权限
virtual_use_local_privs=YES
三、创建chroot list,将vftpd.conf配置文件中的guest_username加入其中:
# touch /etc/vsftpd/chroot_list
# echo ftp >> /etc/vsftpd/chroot_list
四、创建用户密码文件
# touch /etc/vsftpd/vuser_passwd.txt
##注意奇行是用户名,偶行是密码
test
111222
五、生成虚拟用户认证的db文件
如果没有db4需要先进行安装。安装Berkeley DB工具:
# yum install db4 db4-utils
生成虚拟用户认证的db文件:
# db_load -T -t hash -f /etc/vsftpd/vuser_passwd.txt /etc/vsftpd/vuser_passwd.db
六、编辑认证文件:
# vi /etc/pam.d/vsftpd
全部注释掉原来语句再增加以下两句:
##查看系统版本号
# getconf LONG_BIT
#系统为32位的
auth required pam_userdb.so db=/etc/vsftpd/vuser_passwd
account required pam_userdb.so db=/etc/vsftpd/vuser_passwd
#系统为64位的
auth required /lib64/security/pam_userdb.so db=/etc/vsftpd/vuser_passwd
account required /lib64/security/pam_userdb.so db=/etc/vsftpd/vuser_passwd
七、创建虚拟用户配置文件
# mkdir /etc/vsftpd/vuser_conf/
#文件名等于vuser_passwd.txt里面的账户名,否则下面设置无效
# vi /etc/vsftpd/vuser_conf/test
##内容如下:
#虚拟用户根目录,根据实际情况修改(如果没有需要创建)。该目录必须要有读写权限 chmod -R 777 目录。
local_root=/var/ftp/upload
#可写
write_enable=YES
#掩码
anon_umask=022
anon_world_readable_only=NO
anon_upload_enable=YES
anon_mkdir_write_enable=YES
anon_other_write_enable=YES
八、设置防火墙
打开防火墙设置:
# vi /etc/sysconfig/iptables
注释其他,新加如下
# -A INPUT –m state –state NEW –m tcp –p tcp –dport 22 –j ACCEPT
# -A INPUT -m state –state NEW -m tcp -p tcp –dport 21 -j ACCEPT
# -A INPUT -m state –state NEW -m tcp -p tcp –dport 10060:10090 -j ACCEPT
然后保存,并关闭该文件,在终端内运行下面的命令,刷新防火墙配置:
# systemctl restart firewalld.service
如果上传下载中出现错误,看下日志vsftpd.conf(xferlog_file):
tail /var/log/vsftpd.log
如果安装过程中出现错误,可看日志:
tail /var/log/secure
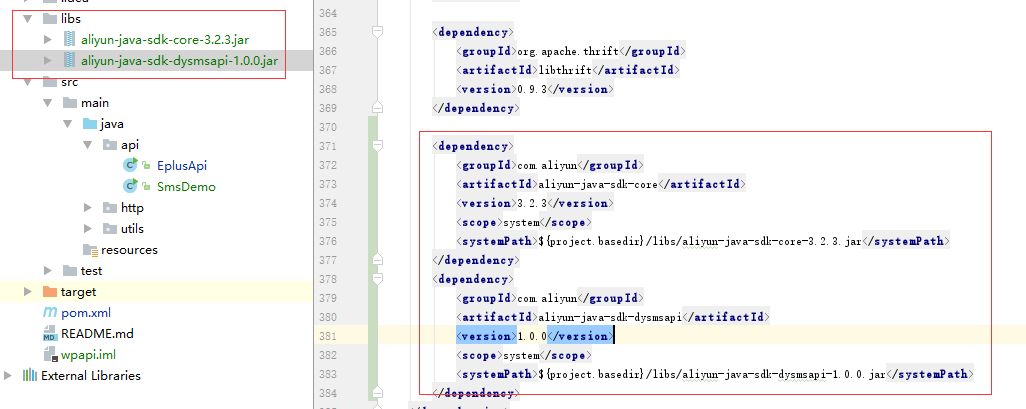
添加第三方库并使其编译进JAR包中
添加第三方JAR包后,为了使第三方包也能打包进SpringBoot的boot-inf/lib目录。
执行打包指令:mvn package
			org.springframework.boot
			spring-boot-starter-web


			org.springframework.boot
			spring-boot-starter-test
			test


			com.aliyun
			aliyun-java-sdk-core
			3.2.3
			system
			${project.basedir}/libs/aliyun-java-sdk-core-3.2.3.jar


			com.aliyun
			aliyun-java-sdk-dysmsapi
			1.0.0
			system
			${project.basedir}/libs/aliyun-java-sdk-dysmsapi-1.0.0.jar


			com.aliyun.mns
			aliyun-sdk-mns
			1.1.8
			system
			${project.basedir}/libs/aliyun-sdk-mns-1.1.8.jar


			com.aliyun
			aliyun-java-sdk-dybaseapi
			1.0.0
			system
			${project.basedir}/libs/aliyun-java-sdk-dybaseapi-1.0.0.jar


			com.aliyun.alicom
			alicom-mns-receive-sdk
			1.0.0
			system
			${project.basedir}/libs/alicom-mns-receive-sdk-1.0.0.jar


            org.apache.httpcomponents
            httpclient
            4.5.3


            org.apache.httpcomponents
            httpasyncclient
            4.1.3


            org.apache.httpcomponents
            httpcore
            4.4.1


            org.apache.httpcomponents
            httpcore-nio
            4.4.1


            org.apache.commons
            commons-lang3
            3.1


				org.springframework.boot
				spring-boot-maven-plugin


                libs
                BOOT-INF/lib/

                    **/*.jar


                src/main/resources
                BOOT-INF/classes/
ruby开发文档
ruby开发文档
http://doc.rubyfans.com/rails/v5.0/
model generator
https://github.com/rails/rails/blob/master/railties/lib/rails/generators/rails/model/USAGE
docker的中国镜像
Docker 中国官方镜像加速可通过 registry.docker-cn.com 访问。该镜像库只包含流行的公有镜像。私有镜像仍需要从美国镜像库中拉取。
您可以使用以下命令直接从该镜像加速地址进行拉取:
$ docker pull registry.docker-cn.com/myname/myrepo:mytag
例如:
$ docker pull registry.docker-cn.com/library/ubuntu:16.04
注: 除非您修改了 Docker 守护进程的 `–registry-mirror` 参数 (见下文), 否则您将需要完整地指定官方镜像的名称。例如,library/ubuntu、library/redis、library/nginx。
使用 –registry-mirror 配置 Docker 守护进程
您可以配置 Docker 守护进程默认使用 Docker 官方镜像加速。这样您可以默认通过官方镜像加速拉取镜像,而无需在每次拉取时指定 registry.docker-cn.com。
您可以在 Docker 守护进程启动时传入 –registry-mirror 参数:
$ docker –registry-mirror=https://registry.docker-cn.com daemon
为了永久性保留更改,您可以修改 /etc/docker/daemon.json 文件并添加上 registry-mirrors 键值。
{
“registry-mirrors”: [“https://registry.docker-cn.com”]
}
修改保存后重启 Docker 以使配置生效。
详情:
https://www.docker-cn.com/registry-mirror
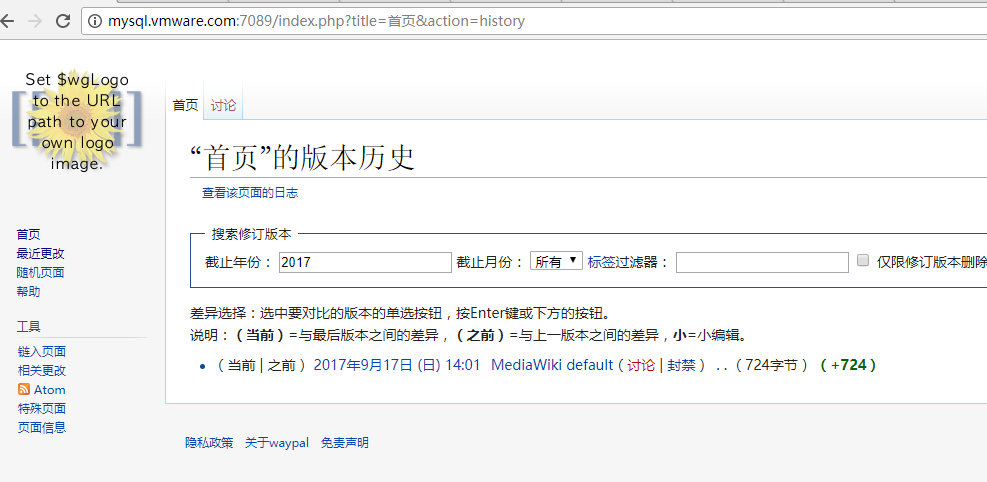
mediawiki的Dockerfile配置
1.sudo docker pull mediawiki
2.sudo docker run –name mediawiki -p 7089:80 -d mediawiki
3.save the LocalSettings.php’s file and copy to mymediawiki/html’s directory.
4.mkdir mymediawiki’s dir
5.write Dockerfile just like bellow.
FROM mediawiki
COPY html/LocalSettings.php /var/www/html/
5.build and run.
sudo docker build -t mymediawiki .
sudo docker run --name mymediawiki -p 7089:80 -d mymediawiki
6.check it.
redmine的启动脚本
Docker守护进程和名字
docker run –name=redmine -it -d
————–
#!/bin/sh

mode=$1

dockerd_current=`ps -ef | grep "dockerd-current"| grep -v grep`
portainer=`ps -ef | grep "/redmine/redmine/config/unicorn.rb"| grep -v grep`

case "$mode" in
   'start')
	echo "it's ready to start op...."
	if test -n "$dockerd_current"; then
		echo "---the docker.service had already started.."
	else
		`sudo systemctl start docker.service`
	fi

	if test -n "$portainer"; then
		echo "---the portainer had already started.."
	else
		`sudo docker stop /redmine`
		`sudo docker rm /redmine`
		`sudo docker run --name=redmine -it -d --env='DB_ADAPTER=mysql2' --publish=10083:80 --env='REDMINE_PORT=10083' --env='DB_HOST=192.168.11.130' --env='DB_NAME=redmine_production'  --env='DB_USER=redmine' --env='DB_PASS=123456' --volume=/srv/docker/redmine/redmine:/home/redmine/data sameersbn/redmine:3.4.2`
	fi
	echo 'success to start.'
	echo '---1--you can test redmine by way bellow----'
	echo 'http://localhost:10083'
	echo 'user:admin   password:123456'
	;;
   'stop')
	echo "it's ready to check process..."
	`sudo systemctl stop docker.service`
	echo 'success to kill.'
	;;
    *)
	basename=`basename "$0"`
	echo "Usage: $basename  {start|stop}  [ server options ]"
	exit 1
	;;
esac
exit 1
docker之portainer搭建
1.安装docker
sudo yum install docker
2.需要使用到htpasswd命令创建密码,故需安装相关组件。
yum install httpd-tools -y
htpasswd -nb -B admin
https://portainer.readthedocs.io/en/stable/configuration.html
4.编写简单的运行脚本
#!/bin/sh

mode=$1

dockerd_current=`ps -ef | grep "dockerd-current"| grep -v grep`
portainer=`ps -ef | grep "portainer --admin-password"| grep -v grep`

case "$mode" in
   'start')
	echo "it's ready to start op...."
	if test -n "$dockerd_current"; then
		echo "---the docker.service had already started.."
	else
		`sudo systemctl start docker.service`
	fi

	if test -n "$portainer"; then
		echo "---the portainer had already started.."
	else
		`sudo docker run -d -p 9000:9000 -v /var/run/docker.sock:/var/run/docker.sock portainer/portainer --admin-password '$2y$05$iOIorOhtjjymgIQT2x2n4.HWAUHCCV0QpvOdKkhJR2t9.s61O3uAe'`
	fi
	echo 'success to start.'
	echo '---1--you can test portainer by way bellow----'
	echo 'http://localhost:9000'
	echo 'user:admin   password:123456'
	;;
   'stop')
	echo "it's ready to check process..."
	`sudo systemctl stop docker.service`
	echo 'success to kill.'
	;;
    *)
	basename=`basename "$0"`
	echo "Usage: $basename  {start|stop}  [ portainer server options ]"
	exit 1
	;;
esac
exit 1
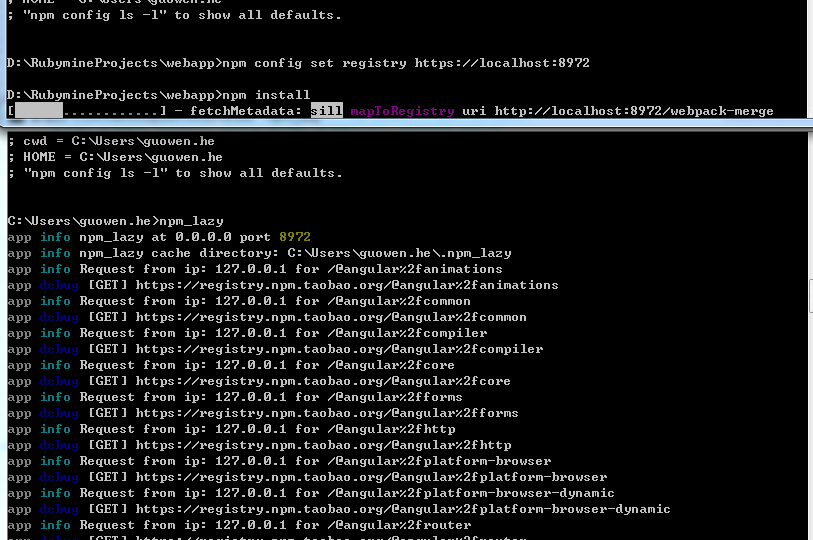
npm的本地缓存npm_lazy方案
具体安装流程参考官网:
1.http://mixu.net/npm_lazy/#installation
2.http://mixu.net/npm_lazy/#configuration
1.安装
npm install -g npm_lazy
2.修改配置,其路径为AppData\Roaming\npm\node_modules\npm_lazy\config.js。
  // external url to npm_lazy, no trailing /
  externalUrl: 'http://localhost:8972',
  // registry url with trailing /
  // remoteUrl: 'https://registry.npmjs.com/',
  remoteUrl: 'https://registry.npm.taobao.org/',
  // bind port and host
  port: 8972,
  host: '0.0.0.0',
3.启动服务
npm_lazy
4.配置npm的镜像路径为。
 // npm config set registry https://registry.npm.taobao.org
 npm config set registry http://localhost:8972
5.npm install
检查是否成功
Angular安装教程及npm使用淘宝镜像
按以下方式设置淘宝镜像,不要使用cnpm,因为cnpm和npm在node_module的目录结构会不一样。建议只使用淘宝的镜像则可。
npm config set registry http://registry.cnpmjs.org
或
npm config set registry https://registry.npm.taobao.org
检查镜像,设置是否正确
npm config list
返回结果,形如下:
D:\RubymineProjects>npm config list
; cli configs
user-agent = "npm/3.10.10 node/v6.11.3 win32 x64"

; userconfig C:\Users\guowen.he\.npmrc
registry = "https://registry.npm.taobao.org/"

; builtin config undefined
prefix = "C:\\Users\\guowen.he\\AppData\\Roaming\\npm"

; node bin location = C:\Program Files\nodejs\node.exe
; cwd = D:\RubymineProjects
; HOME = C:\Users\guowen.he
; "npm config ls -l" to show all defaults.
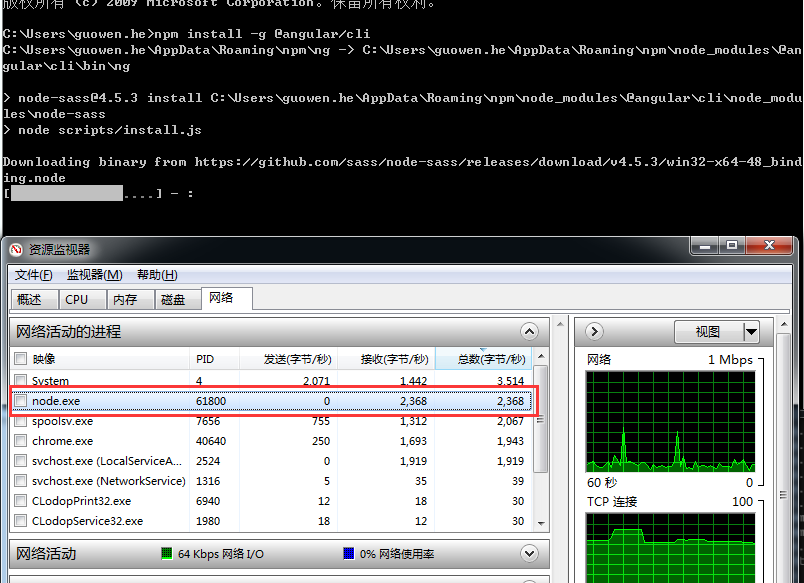
有时安装进度,好像很久都没有变化似的,可以使用以下通过检查node的网络流量是否有变化,来确定是否仍在工作,如果没有该进程很久都没有接收到流量数据,则可以重新安装。
如果曾经设置过淘宝cnpm对象,则会导致new project会失败,可使用以下命令修改为npm
ng set –global packageManager=cnpm
改为
ng set –global packageManager=npm
————————
1.安装python2.7.x,Angular的某些组件会使用它。
2.安装angular组件
因为angular-cli是用typescript写的,所以要先装这两个
npm install -g typescript typings
npm install -g @angular/cli ,若观察到node的接收到的数据流量慢慢变小,最后差不多为0,则代表网络已经断开,可用Ctrl+C强制停止,重新执行该命令,该命令可多次停止并重新执行。
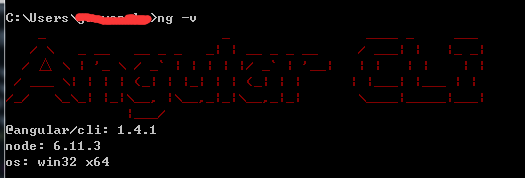
ng -v,检查是否安装成功
----
如果你之前安装失败过,最好在安装angular-cli之前先卸载干净,用以下两句:
npm uninstall -g angular-cli
npm cache clean
可能新版本会提示使用npm cache verify删除,可能删除不成功,强制删除
npm cache verify --force
最后执行ng -v时,显示如下,则代表安装成功了。