转:Tomcat的运行模式
tomcat的运行模式有3种.修改他们的运行模式.3种模式的运行是否成功,可以看他的启动控制台,或者启动日志.或者登录他们的默认页面http://localhost:8080/查看其中的服务器状态。
1)bio
默认的模式,性能非常低下,没有经过任何优化处理和支持.
2)nio
利用java的异步io护理技术,no blocking IO技术.
想运行在该模式下,直接修改server.xml里的Connector节点,修改protocol为
启动后,就可以生效。
3)apr
安装起来最困难,但是从操作系统级别来解决异步的IO问题,大幅度的提高性能.
必须要安装apr和native,直接启动就支持apr。下面的修改纯属多余,仅供大家扩充知识,但仍然需要安装apr和native
如nio修改模式,修改protocol为org.apache.coyote.http11.Http11AprProtocol
Tomcat的四种基于HTTP协议的Connector性能比较
我们姑且把上面四种Connector按照顺序命名为 NIO, HTTP, POOL, NIOP
为了不让其他因素影响测试结果,我们只对一个很简单的jsp页面进行测试,这个页面仅仅是输出一个Hello World。假设地址是 http://tomcat1/test.jsp
我们依次对四种Connector进行测试,测试的客户端在另外一台机器上用ab命令来完成,测试命令为: ab -c 900 -n 2000 http://tomcat1/test.jsp ,最终的测试结果如下表所示(单位:平均每秒处理的请求数):
NIO HTTP POOL NIOP
281 65 208 365
666 66 110 398
692 65 66 263
256 63 94 459
440 67 145 363
由这五组数据不难看出,HTTP的性能是很稳定,但是也是最差的,而这种方式就是Tomcat的默认配置。NIO方式波动很大,但没有低于280 的,NIOP是在NIO的基础上加入线程池,可能是程序处理更复杂了,因此性能不见得比NIO强;而POOL方式则波动很大,测试期间和HTTP方式一样,不时有停滞。
由于linux的内核默认限制了最大打开文件数目是1024,因此此次并发数控制在900。
尽管这一个结果在实际的网站中因为各方面因素导致,可能差别没这么大,例如受限于数据库的性能等等的问题。但对我们在部署网站应用时还是具有参考价值的。
服务器监控命令dstat
dstat -tamsl
dstat 是一个可以取代vmstat,iostat,netstat和ifstat这些命令的多功能产品。dstat克服了这些命令的局限并增加了一些另外的功能,增加了监控项,也变得更灵活了。dstat可以很方便监控系统运行状况并用于基准测试和排除故障。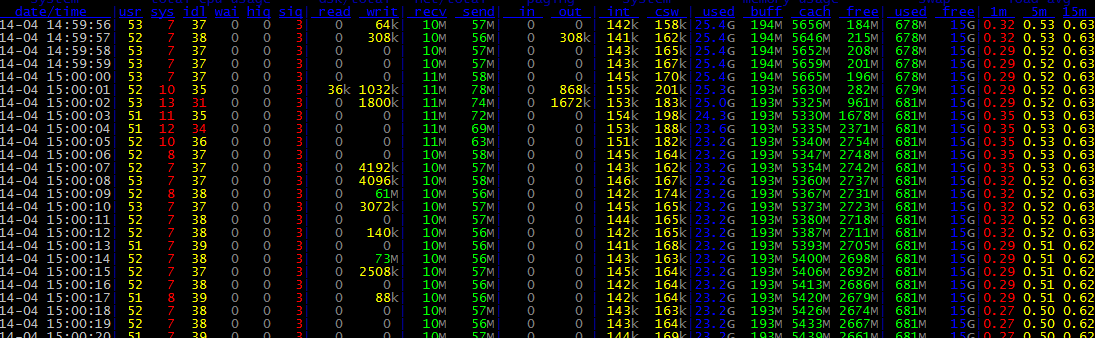
ethtool eth0查网卡信息
mvc:annotation-driven与context:annotation-config
并提供了:数据绑定支持,@NumberFormatannotation支持,@DateTimeFormat支持,@Valid支持,读写XML的支持(JAXB),读写JSON的支持(Jackson)。
后面,我们处理响应ajax请求时,就使用到了对json的支持。
后面,对action写JUnit单元测试时,要从spring IOC容器中取DefaultAnnotationHandlerMapping与AnnotationMethodHandlerAdapter 两个bean,来完成测试,取的时候要知道是
declares support for general annotations such as @Required, @Autowired, @PostConstruct, and so on.
, but don't bother with
当我们需要controller返回一个map的json对象时,可以设定
同时设定
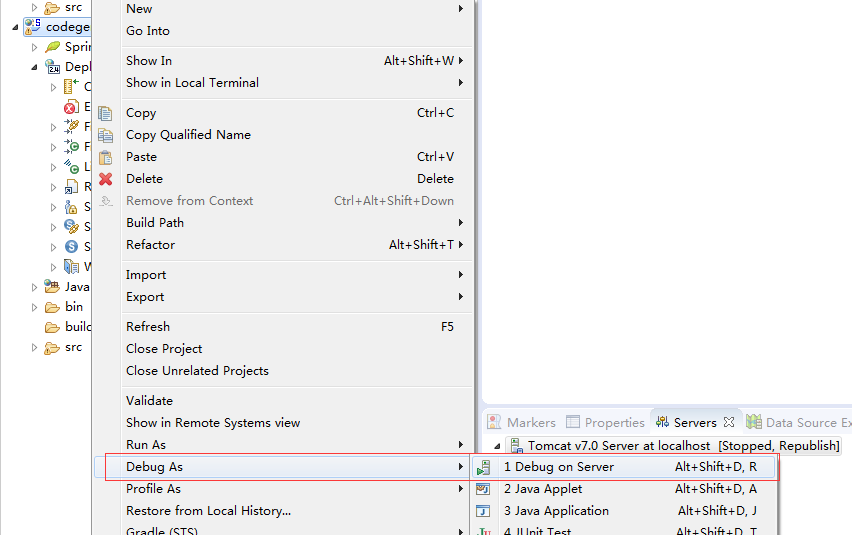
Tomcat的调试的另一种方式
1.进入调试对话框
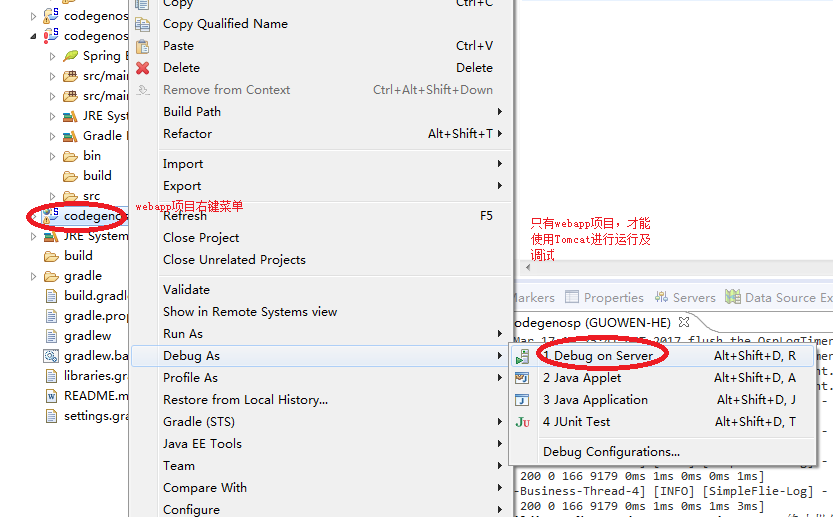
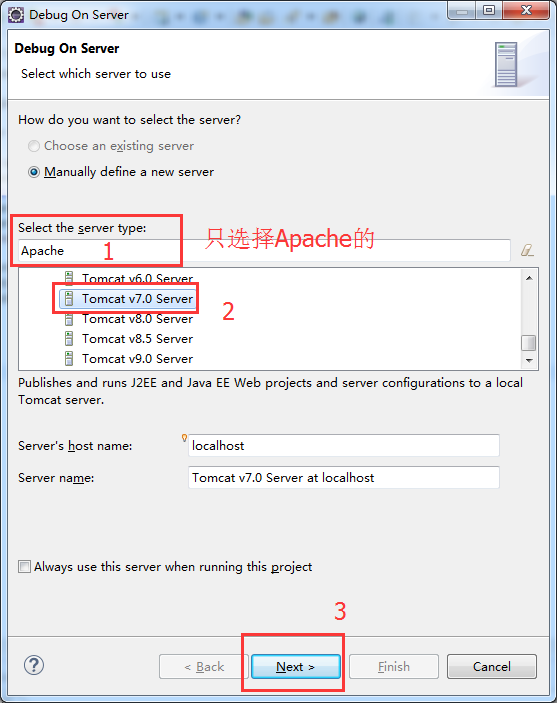
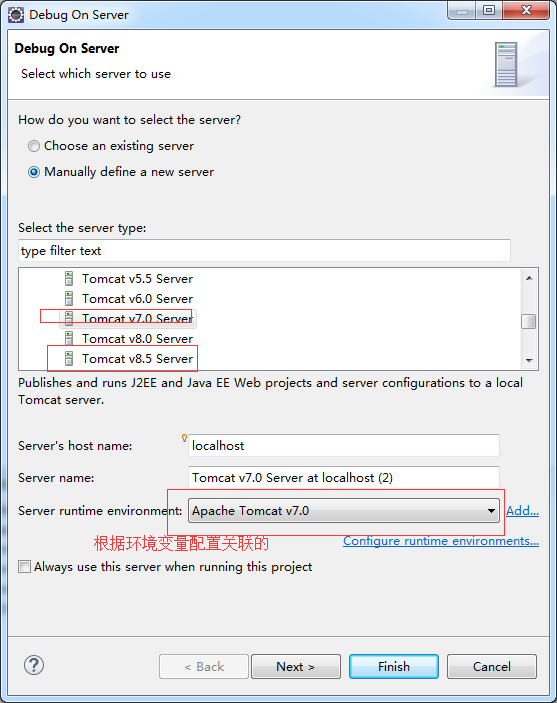
2.在调试对话框中,选择Apache的Tomcat v7.0。
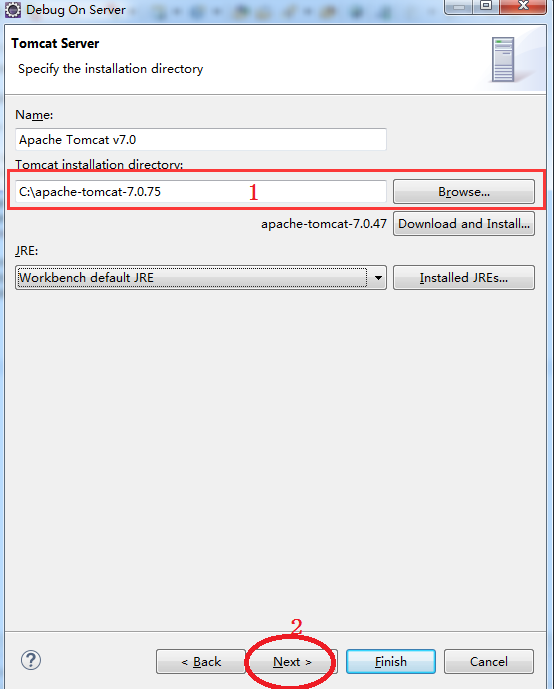
3.完成Tomcat的配置并进入下一步
4.检查调试配置,并完成。
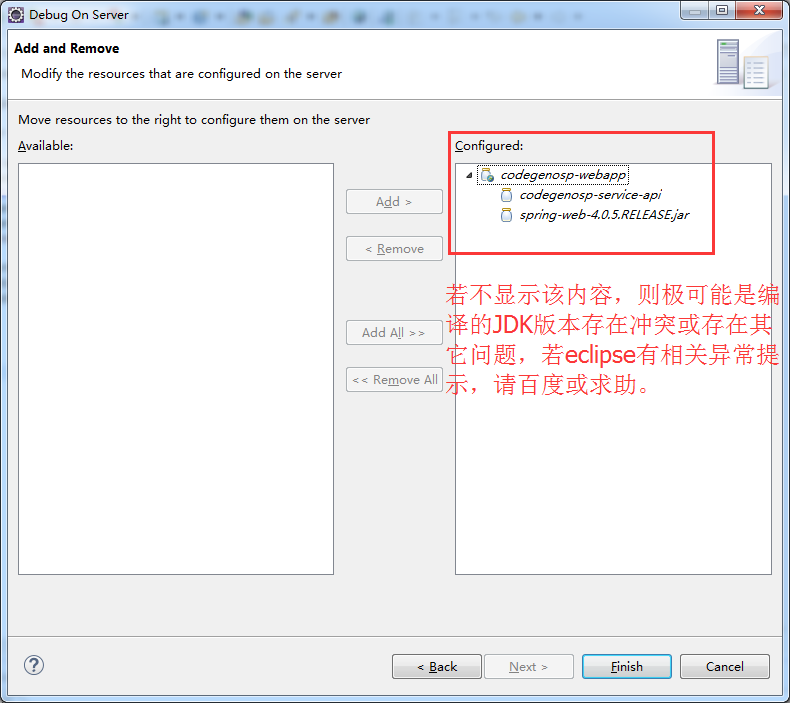
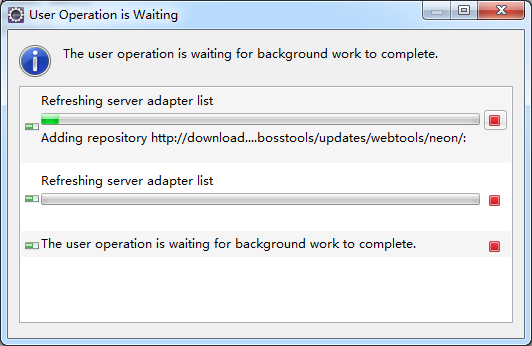
5.若显示以下对话框,请耐心等待(第一次操作时由于本地没有缓存,会配置时间稍长一点,第二次操作后,会快很多)。
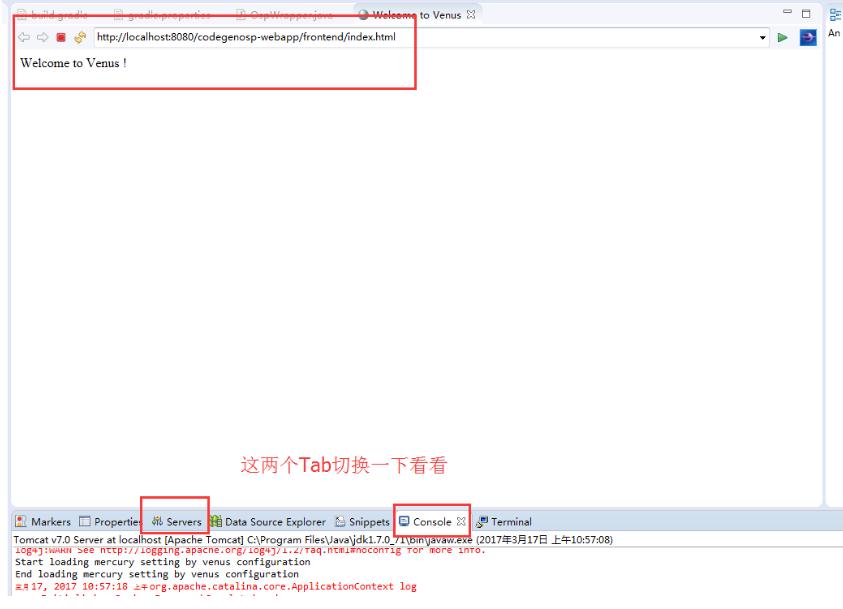
6.正常运行,显示如下:
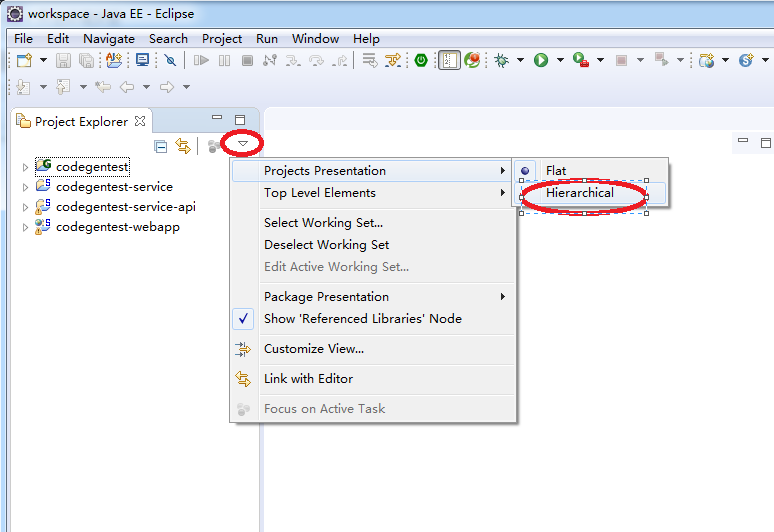
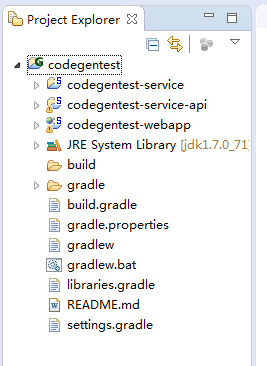
修改项目展示结构
默认eclipse的项目结构是扁平结构的。
由于eclipse的项目管理不能像IDEAJ的那样,可以在不同的窗口中打开不同的项目,故在多个项目下扁平展示结构,容易导致一些混乱,故建议修改它。
多个项目下,默认的项目结构展示方式及修改后结果
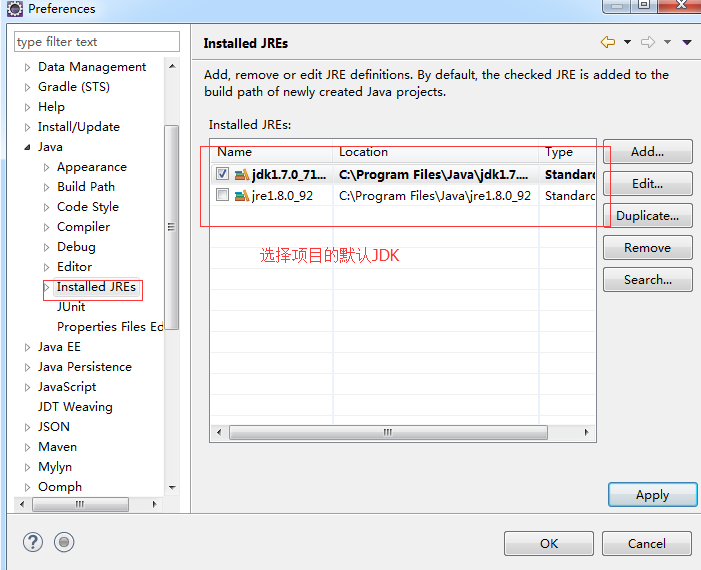
指定JDK的编译版本
eclipse-4.6.2版本,默认JDK的编译版本是1.8,故在编译目标平台为JDK1.7.x的时候,需要修改其编译版本,否则在导入工程时,会导致导入后的工程默认JAVA编译版本为1.8。
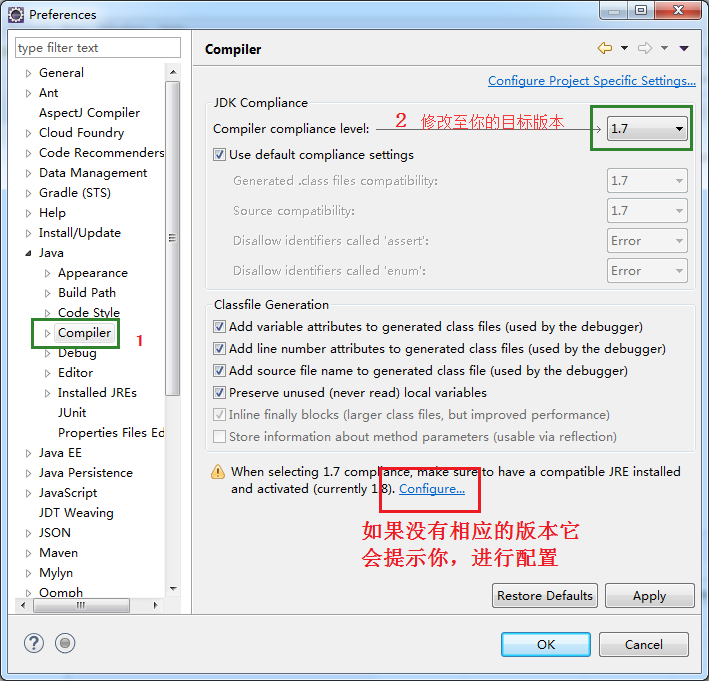
此外,仍然要添加1.7.x的已经安装版本。如下图
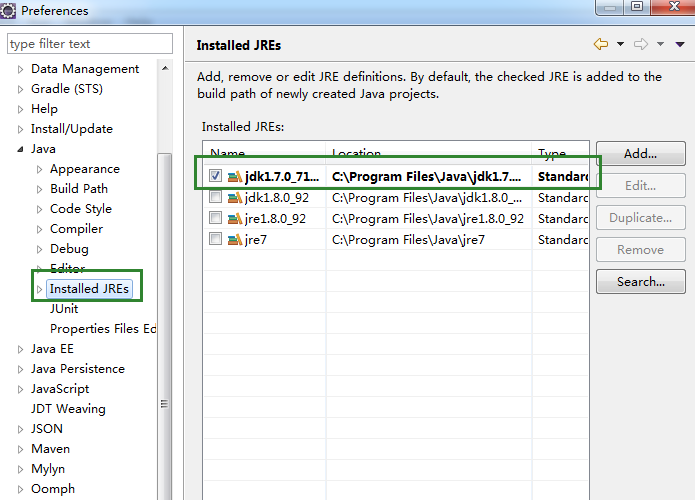
至此,仍有一些特殊,如使用Gradle,也需要同步修改导入的JDK版本,才能正常编译与调试,否则会出错,如下图。
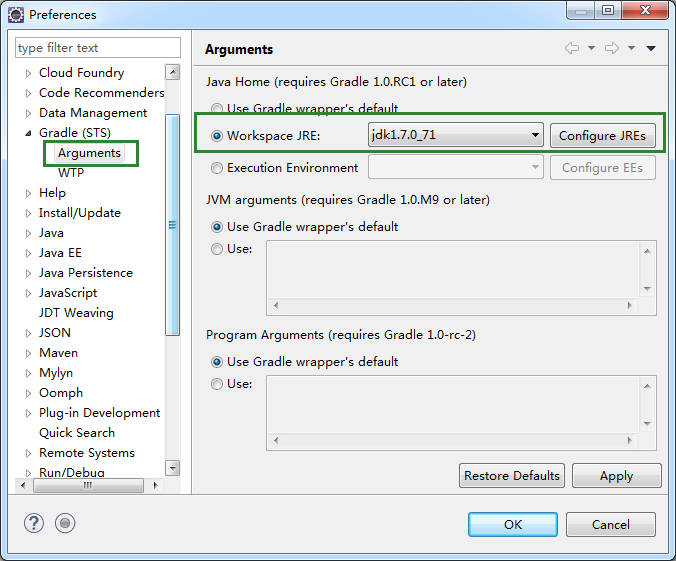

按道理应该是可以在build.gradle中指定编译版本,但发现网上说的方法,均在导入项目过程中报脚本属性错误,估计网上的方法是适用于Android版本。
形如:
sourceCompatibility = "1.6"
targetCompatibility = "1.6"
@ResponseBody和ResponseEntity
@RequestMapping(value="/response", method=RequestMethod.GET)
public class ResponseController {

//http://127.0.0.1:8010/response/annotation
	@RequestMapping("/annotation")
	public @ResponseBody String responseBody() {
		return "The String ResponseBody";
	}


	@RequestMapping("/charset/accept")
	public @ResponseBody String responseAcceptHeaderCharset() {
		return "\u3053\u3093\u306b\u3061\u306f\u4e16\u754c\uff01 (\"Hello world!\" in Japanese)";
	}

//http://127.0.0.1:8010/response/charset/produce
	@RequestMapping(value="/charset/produce", produces="text/plain;charset=UTF-8")
	public @ResponseBody String responseProducesConditionCharset() {
		return "\u3053\u3093\u306b\u3061\u306f\u4e16\u754c\uff01 (\"Hello world!\" in Japanese)";
	}

//http://127.0.0.1:8010/response/entity/status
	@RequestMapping("/entity/status")
	public ResponseEntity responseEntityStatusCode() {
		return new ResponseEntity("The String ResponseBody with custom status code (403 Forbidden)",
				HttpStatus.FORBIDDEN);
	}

//http://127.0.0.1:8010/response/entity/headers
	@RequestMapping("/entity/headers")
	public ResponseEntity responseEntityCustomHeaders() {
		HttpHeaders headers = new HttpHeaders();
		headers.setContentType(MediaType.TEXT_PLAIN);
		return new ResponseEntity("The String ResponseBody with custom header Content-Type=text/plain",
				headers, HttpStatus.OK);
	}

}
eclipse搭建gradle与springMVC的框架及Tomcat调试
经实际验证,发现eclipse-4.5.2版本,如果JDK只是1.7.x的版本,在安装STS离线包时,会跳过Spring的相关安装,故需要检查JDK是否为1.8.x版本。
——————————–
下载eclipse,不建议下载最新版本,因为很多外围辅助插件没有及时升级至最新版本的。如SpringMVC为例。
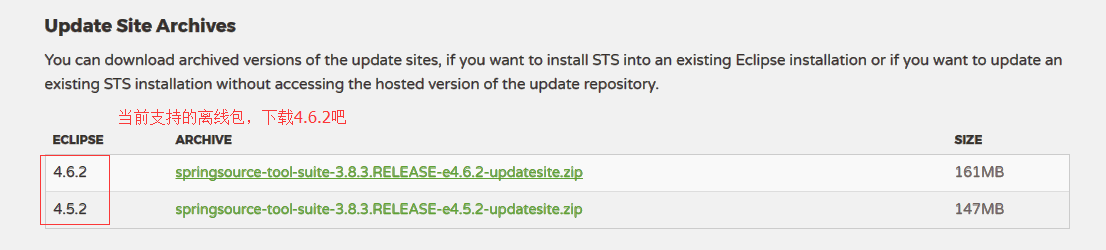
1.打下如下链接,下载STS的最新离线包版本,(可以通过eclipse来在线安装,但下载比较慢也容易失败。)
http://spring.io/tools/sts/all
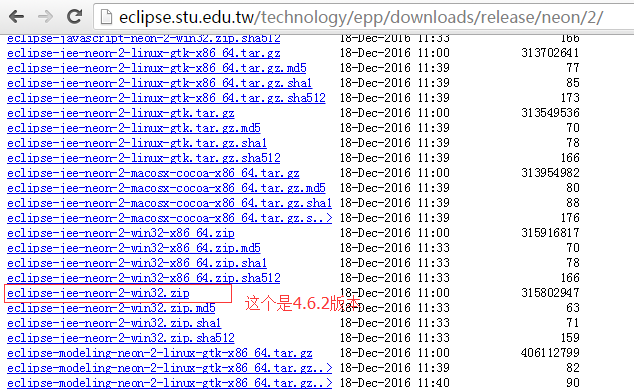
2.下载相应的eclipse-for-jee,如果官网没有显示与之匹配的版本下载,则你需要尝试链接测试。
http://eclipse.stu.edu.tw/technology/epp/downloads/release/neon/2/eclipse-jee-neon-2-win32-x86_64.zip
3.或者你可以尝试以下地址,也就是从上述的下载地址猜测出的所有版本下载地址(也有可能会失效,但你可以仍然通过某一完整下载地址尝试测试)。
http://eclipse.stu.edu.tw/technology/epp/downloads/release/
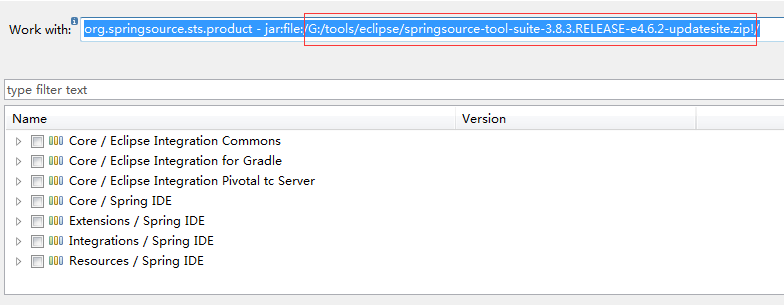
4.打开刚下载的eclipe-4.6.2,help->install new software,打开如下安装对话框,选择你的离线包。
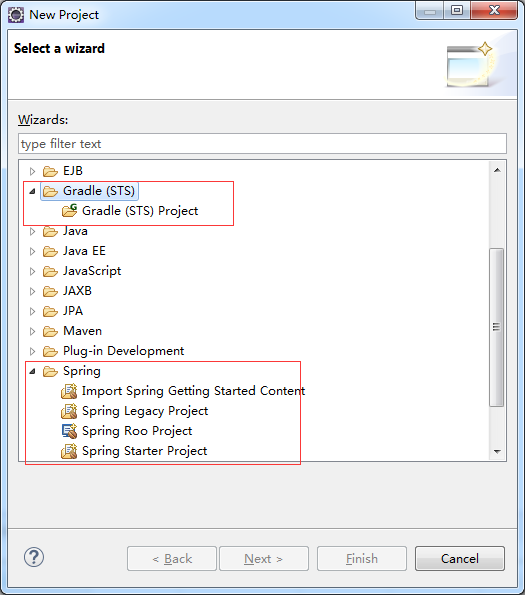
5.安装完成后,会提示重启,重启后,将可看到Gradle和Spring的相关项目如下。
File->New->Project
6.安装Tomcat,路径:Window->Preference。
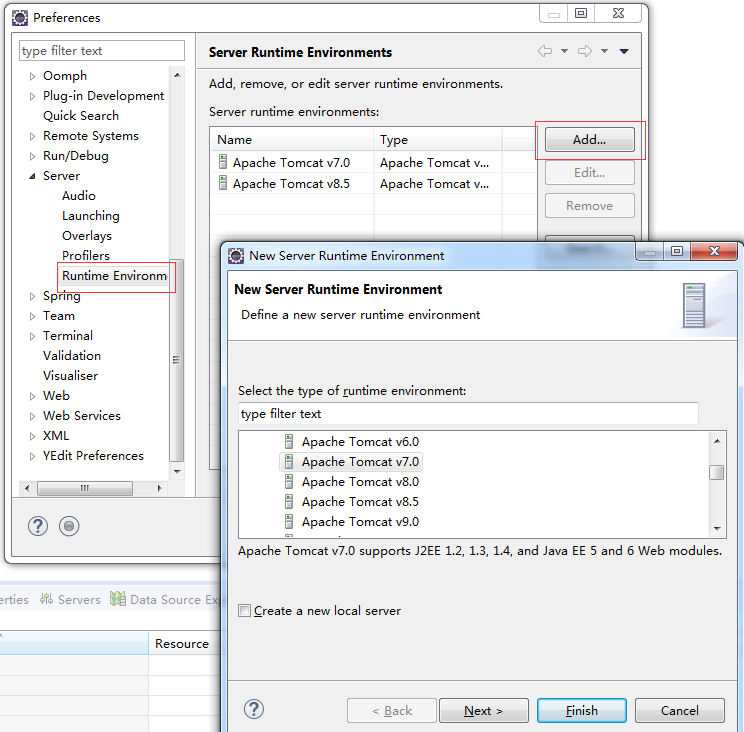
7.测试Tomcat
8.添加并选择默认的项目JDK。
强制重置mysql密码
https://dev.mysql.com/doc/refman/5.7/en/resetting-permissions.html