安装Git2.x版本

在Centos6.x系统中,Git的版本为1.7.1.0版本,也Phpstorm要求的Git版本的最小版本为1.7.1.1,仅差0.0.0.1,如果要启用所有的phpstorm自带的GIT管理功能,则有必要升级GIT的版本。
因为本人还升级python为2.7.8故,仍需要确/usr/bin/python是可执行的。
根据官方文章介绍。https://git-scm.com/book/en/v2/Getting-Started-Installing-Git
Installing from Source
Some people may instead find it useful to install Git from source, because you’ll get the most recent version. The binary installers tend to be a bit behind, though as Git has matured in recent years, this has made less of a difference.

If you do want to install Git from source, you need to have the following libraries that Git depends on: curl, zlib, openssl, expat, and libiconv. For example, if you’re on a system that has yum (such as Fedora) or apt-get (such as a Debian based system), you can use one of these commands to install the minimal dependencies for compiling and installing the Git binaries:

$ sudo yum install curl-devel expat-devel gettext-devel \
openssl-devel perl-devel zlib-devel
$ sudo apt-get install libcurl4-gnutls-dev libexpat1-dev gettext \
libz-dev libssl-dev
In order to be able to add the documentation in various formats (doc, html, info), these additional dependencies are required (Note: users of RHEL and RHEL-derivatives like CentOS and Scientific Linux will have to enable the EPEL repository to download the docbook2X package):

$ sudo yum install asciidoc xmlto docbook2X
$ sudo apt-get install asciidoc xmlto docbook2x
Additionally, if you’re using Fedora/RHEL/RHEL-derivatives, you need to do this

$ sudo ln -s /usr/bin/db2x_docbook2texi /usr/bin/docbook2x-texi
due to binary name differences.

When you have all the necessary dependencies, you can go ahead and grab the latest tagged release tarball from several places. You can get it via the Kernel.org site, at https://www.kernel.org/pub/software/scm/git, or the mirror on the GitHub web site, at https://github.com/git/git/releases. It’s generally a little clearer what the latest version is on the GitHub page, but the kernel.org page also has release signatures if you want to verify your download.

Then, compile and install:

$ tar -zxf git-2.0.0.tar.gz
$ cd git-2.0.0
$ make configure
$ ./configure --prefix=/usr
$ make all doc info
$ sudo make install install-doc install-html install-info
After this is done, you can also get Git via Git itself for updates:

$ git clone git://git.kernel.org/pub/scm/git/git.git

Android后台运行

在播放音乐或定时器的情况,需要程序在后台运行,则此时可以打开以下开关。

<meta-data android:name=”android.app.background_running” android:value=”true”/>

QML的多语言支持

1.Pro工程文件配置

TRANSLATIONS
+=
muyu.ts

lupdate_only{


SOURCES
+=
\


kxmob/*.qml
\


listmgr/*.qml

}

2.导入语言包

QTranslator
translator;


if(translator.load(“:/muyu.qm”)){


app.installTranslator(&translator);

}

3.
工具->外部->Qt语言家->更新翻译lupdate,lrelease

QML控件风格与应用配置的读与写

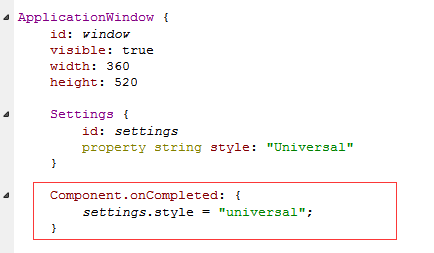
QML quickcontrol已经具备设置风格,故需要如下设置(可参考Qt5.6.0\Examples\Qt-5.6\qtquickcontrols2\controls例子)

在QML中导入风格库

import
Qt.labs.controls
1.0

import
Qt.labs.controls.material
1.0

import
Qt.labs.controls.universal
1.0


Qt闪屏

Qt的闪屏,使用QtCreator向导创建的Android应用,在应用启动时,首先看到黑色的背景及标题,非常丑,一直想修改它。偶然看到一个大作的应用,非常优雅的实现一个闪屏,完美的解决了原有默认的启动效果,于是学习他制作了一个例子。

例子仓库:https://github.com/kxtry/AndroidSplash

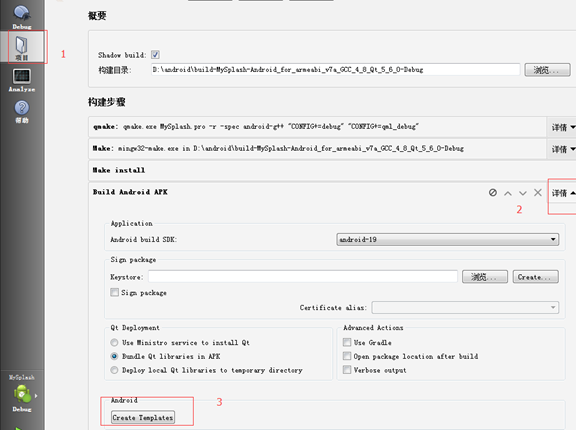
  1. 首先是创建AndroidManifest.xml文件

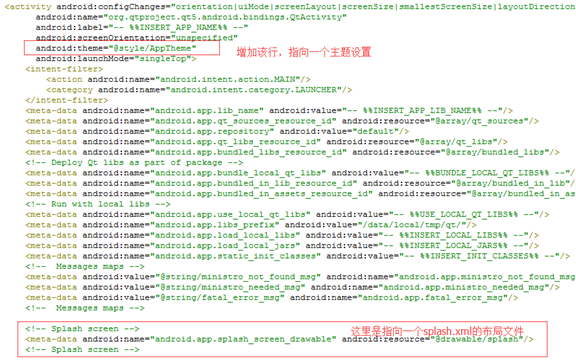
  2. 修改该文件里的几项如下图:

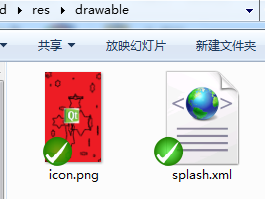
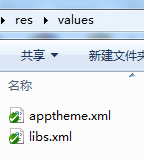
    文件目录结构如下:

    Apptheme.xml文件内容:

    <?xml version=”1.0″ encoding=”utf-8″?>

    <resources>

    <style name=”AppTheme” parent=”@android:style/Theme.DeviceDefault.Light.NoActionBar”>

    <item name=”android:windowBackground”>@drawable/splash</item>

    </style>

    </resources>

    Splash.xml文件内容如下:

    <?xml version=”1.0″ encoding=”utf-8″?>

    <layer-list xmlns:android=”http://schemas.android.com/apk/res/android”>

    <item>

    <shape android:shape=”rectangle” >

    <solid android:color=”#FFFFFFFF”/>

    </shape>

    </item>

    <item>

    <bitmap android:src=”@drawable/icon” android:gravity=”center” />

    </item>

    </layer-list>

  3. 编译程序,即可。

QTDesigner的QVBoxLayout自动随窗口拉伸

在MainWindow的构造函数中添加如下代码:
//设置Ui
ui.setupUi(this);

//使Ui可自适应父窗口大小
QVBoxLayout* mainLayout = new QVBoxLayout;
mainLayout->addWidget(ui.verticalLayoutWidget);
setLayout(mainLayout);

MainWindow::MainWindow(QWidget *parent) :
QMainWindow(parent),
ui(new Ui::MainWindow)
{
ui->setupUi(this);
QVBoxLayout* mainLayout = new QVBoxLayout;
mainLayout->addWidget(ui->verticalLayoutWidget);
ui->centralWidget->setLayout(mainLayout);
}

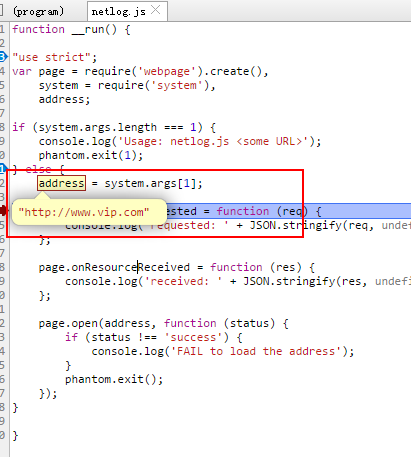
Phantomjs的远程调试

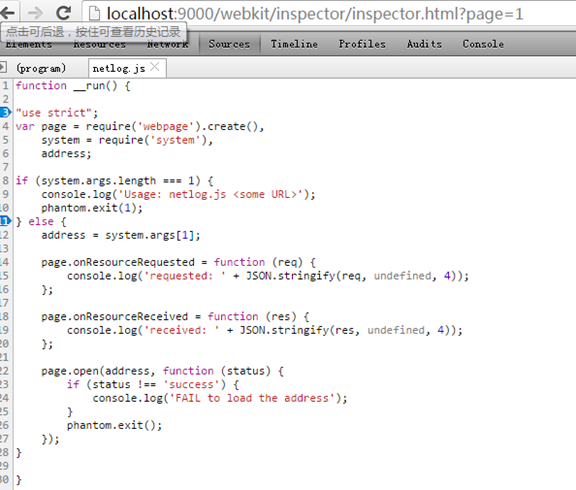
  1. 命令行:

    phantomjs –remote-debugger-port=9000 netlog.js http://www.vip.com

  2. 在浏览器打开:

    http://localhost:9000/

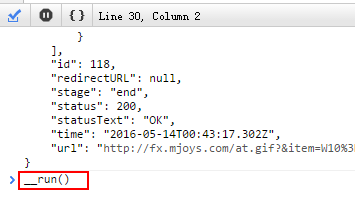
  3. 在console中执行如下命令:

    __run()

    在调试OK

Remotely debug PhantomJS


If you need to nicely debug a page in PhantomJS you can use remote debugging feature.

First you have to create a file test.js with following contents:
require(‘webpage’).create().open(“http://localhost/yourproject.html”);
Now you do:

  1. Run in terminal phantomjs –remote-debugger-port=9000 test.js
  2. Open in browser (ex. Chrome) page localhost:9000
  3. There should be a link with title about:page – follow that link
  4. A remote debugger (similar to Chrome) will open as a page. Type in its console (bottom left icon)__run() and run it (press enter)
  5. Open again localhost:9000 in a new tab, now you should see one more link – follow it
  6. You opened the debugger for your page

    If you want to set breakpoints before page will run then replace your test.js contents with:


    Now you do:

  7. Run in terminal phantomjs –remote-debugger-port=9000 test.js
  8. Open in browser (ex. Chrome) page localhost:9000
  9. There should be a link with title about:page – follow that link
  10. A remote debugger (similar to Chrome) will open as a page. Type in its console (bottom left icon)__run() and run it (press enter)
  11. Open again localhost:9000 in a new tab, now you should see one more link – follow it
  12. Go back to first tab and continue script execution (it should be stopped at debugger point)
  13. Go back to second tab and set your desired break points. When you set them continue script execution (it should be stopped at debugger point)
  14. Now inspect your code.

    September 16, 2014